How to Install Stick on Wall Tiles
Rooms where water is used regularly like kitchens and bathrooms can require an update more often than other areas around the home. Although refreshing the paint on your walls, replacing the doors on your units, or even fitting all-new appliances can make immediate improvements, you may find after your makeover is complete that your tiling is still letting the side down and needs replacing.
Removing old tiles and putting new ones in their place has a reputation for being a messy and expensive business. Picturing grouting covered hands and cracked wonky tiles on the wall is enough to drive many homeowners to leave this task to the professionals. However, there is another tiling option that is more affordable and easier to use.
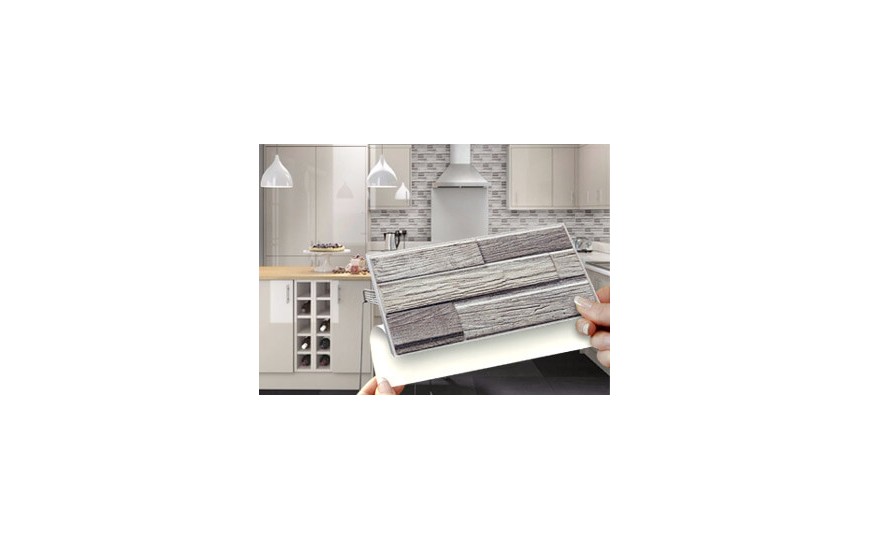
Stick on tiles offer an alternative to conventional solutions and are well suited to DIY devotees. These adhesive tiles remove the fuss and cost of a standard tiling project and can be simply installed over the tiles presently in place. Follow these four steps to retile your kitchen or bathroom with a stick-on solution.
Stage 1 – Prep your existing tiles
First, ensure your new solution will adhere efficiently by prepping the tiles they will cover. Take a cloth with a little degreaser on it and wipe down your old tiles, including any grimy grouting as this will still remain visible. Make certain the tiles present a clean and smooth surface and give them a thorough drying with a kitchen towel to remove any moisture.
Stage 2 – Get equipped
No special tools are required for stick-on tiles, you’ll only need a tape measure, a ruler, a pen or pencil, a craft knife and a pad to cut on so you won’t scratch your surfaces.
Stage 3 – Measure then mark
Measure the tiled space you need to cover. If there are complex areas to consider like sockets or switches, you can measure the precise tile shape you need by marking the back of your new tiles with a pen or pencil.
Stage 4 – Trim to fit and position your tiles
Finally, using the knife, cut your tiles and trim for a perfect fit. The ruler will help you cut straight. Now you’re ready to add your adhesive tiles, just peel and stick them in the appropriate place over your existing tiles. You’ll find that you can fine-tune them into the exact position during the sticking process before they’re fixed in place.